In this tutorial we will demonstrate one workflow to create a photo simulation using MicroStation.
Below are some items to consider before you take your first photo. Ranked in order from “most important” to “still important.”
- Know the location where the photo was taken within a 5′ diameter, including elevation, and eye height from the ground.
- Make sure there are items in the photo that correspond to field collected data for horizontal control.
* power poles, building corners, pavement edges, trees, light poles - Make sure there are items in the photo that correspond to field collected data for vertical control.
* building heights, heights of poles, elevation of structures - Take the photo with at least a 5MB pixel camera if you want the final image to be 22″x34″.
- Full sun is ideal but make sure the time of day will not cast shadows that will cause problems when you try to render the new building.
- NO SNOW on the ground. It is almost impossible to photo match snow patches into a rendering and still have it look good.
- It is pleasing to the eye to have some items in the foreground. For example a tree, sidewalk, terrace, etc.
MORE MICROSTATION TIPS
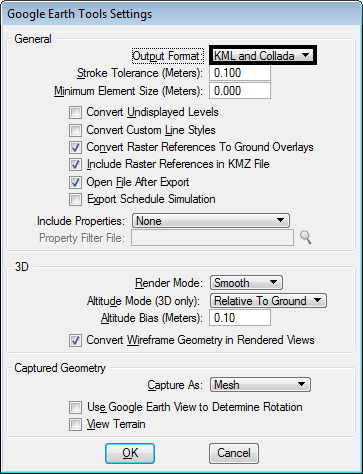

Rendering Material Assignments in Google Earth What’s New in V8i SELECTseries3 Update 2