Written by: Bryan Sullivan
You may have received a subassembly from a client or vendor. Or you may have created your first subassembly in Subassembly Composer. So how do you add that subassembly to Civil 3D so we can use it in a drawing?
First of all we will need the *.pkt file(s) for our subassembly. A *.pkt file contains the subassembly files to be installed on a Civil 3D installation. (A *.pkt file is really just a *.zip file containing the subassembly code files.)
LOADING A SUBASSEMBLY
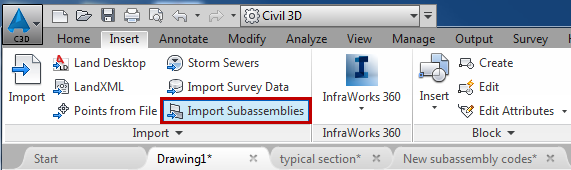
1. On the Insert tab of the Ribbon select Import Subassemblies
2. The Import Subassemblies Dialog will appear
3. Browse to a Source *.pkt file (More than one file can be added at a time.)
4. Choose whether to Import To a Tool Palette or the Catalog Library
5. Select a Tool Palette from the list (Note: If importing to a new palette the new palette must be created before step 1.)
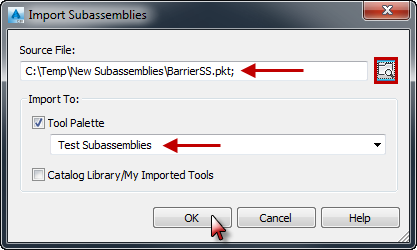
6. Click OK
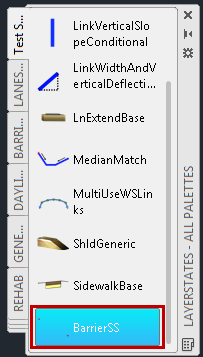
7. The subassembly is now available from the palette
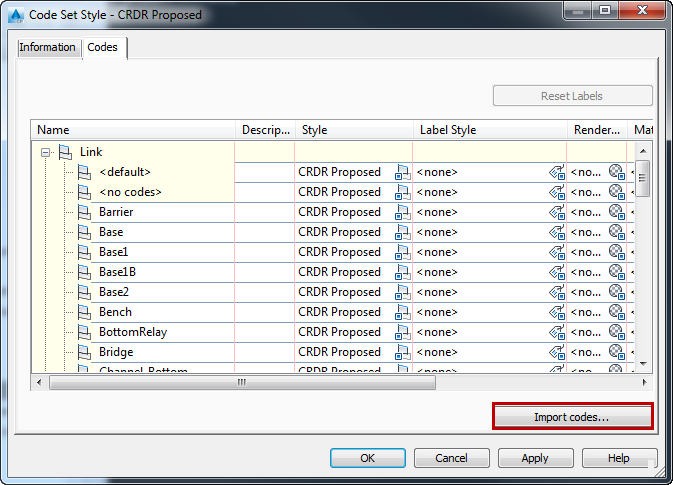
ADDING CODES TO A CODE SET STYLE
You may want to add any new codes from the new subassembly to a Code Set Style.
1. Open a template or drawing with Code Set Styles
2. Insert subassembly with codes to add anywhere in model space (Hint: Use detached mode)
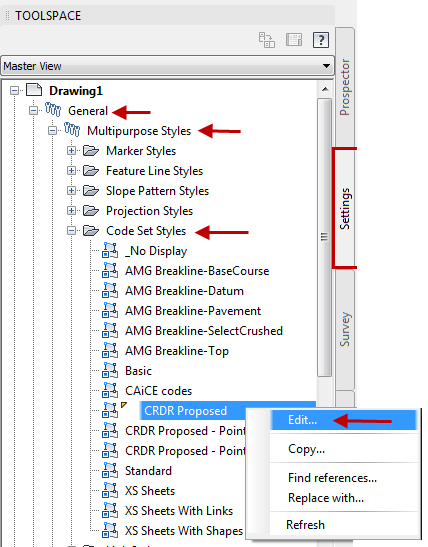
3. On the Settings tab of the Toolspace browse to a Code Set Style
4. Right-click and select Edit…
5. Select Import Codes
6. Select the subassembly placed in model space
7. Make any edits to styles, etc. associated with the new codes
8. Click OK
9. Delete the subassembly in model space
10. Save your template (or drawing)
Hi there, I have a drawing that has not been opened on my computer and when I open to edit I receive a message saying “One or more subassembly macros (or .Net classes) could not be found” (https://knowledge.autodesk.com/support/civil-3d/troubleshooting/caas/sfdcarticles/sfdcarticles/Error-One-or-more-subassembly-Net-classes-could-not-be-found.html)
We are trying to find a work around so we don’t need to save the .pkt file with a new name and reimport.
What we find is when we go that we lose any target settings and have to redo that part of the process.
Any insight on this subject would be extremely appreciated!
Hi Brian,
Is this a stock subassembly or custom subassembly? If it is custom and someone in your office has the subassembly working on their machine, just copy the files from their “Imported Tools” folder to your machine.
C:\ProgramData\Autodesk\C3D 20xx\enu\Imported Tools\
You can match the ID number in the Event Viewer message to the name of the subassembly *.dll to verify.