Written By: Bryan Sullivan
In last month’s tip, we imported custom subassemblies into Civil 3D. These custom subassemblies may have different Link, Point, and Shape codes than we had before. In order to use any new codes in a drawing we need to add them to a Code Set Style. Our new subassembly codes can be added to an existing style or new style.
CREATING A CODE SET STYLE
1. Open a drawing or create a new drawing.
2. The subassembly with the new codes must be inserted in the drawing in order to import the codes. If it is not already in the drawing insert the subassembly. It can be inserted Detached. It does not need to be added to any assembly to add the codes.
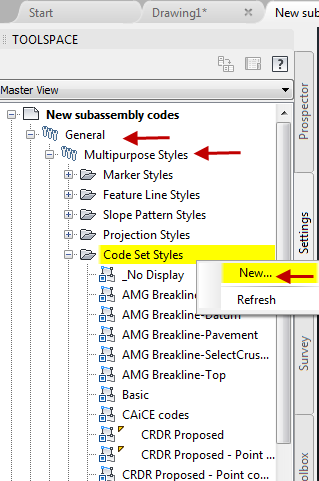
3. On the Settings tab of the Toolspace expand General >> Multipurpose Styles >> Code Set Styles.
4. Right-click on Code Set Styles and select “New…”.
5. The Code Set Style Dialog will appear.
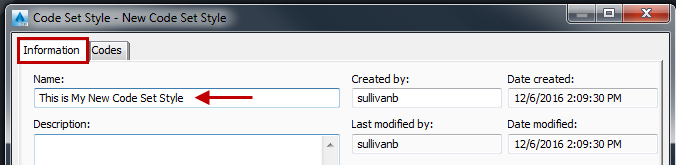
6. On the Information tab give this new Code Set Style a name.
IMPORTING CODES
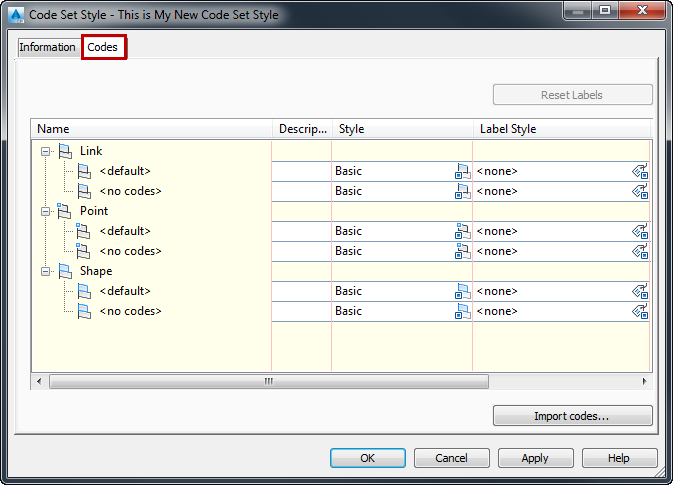
1. Switch to the Codes tab.
2. Expand the Link, Point, and Shape sections to view the contents. The new Code Set Style only contains <default> and <no codes> codes.
3. Click the “Import codes…” button in the lower right of the dialog box.
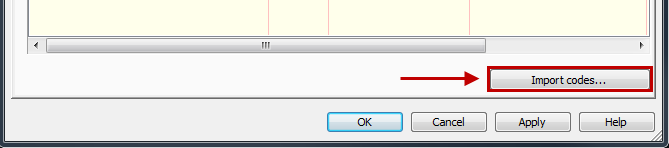
4. Select the subassembly that contains the codes to add and hit <enter>.
In the image below, I am using a Code Set Style that shows link code and point code labels. This is just for display purposes of this exercise to compare the codes displayed in the subassembly to the codes in the Code Set Style.

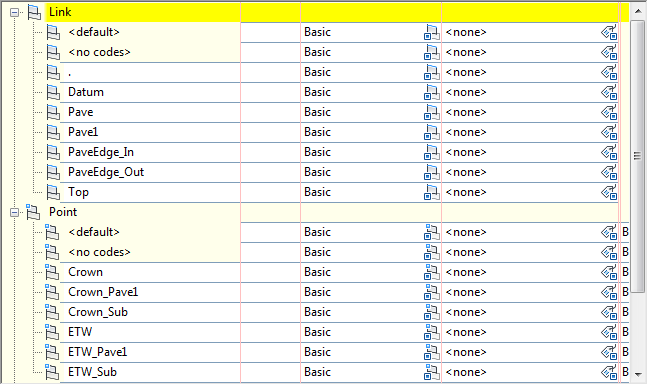
All of the codes that were inserted in the drawing were added to the Code Set Style, but I happen to know that this subassembly contains more codes for additional features not shown, but these codes were not inserted with the subassembly and they were not added to the Code Set Style.
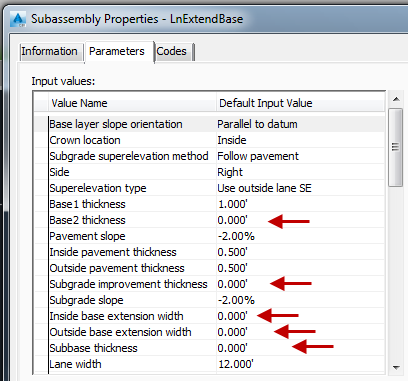
5. If we look at the Subassembly Properties, we can see that the default settings leave some values zeroed out. We need to put values in for all parameters and choose any parameter options available to insert all available codes.
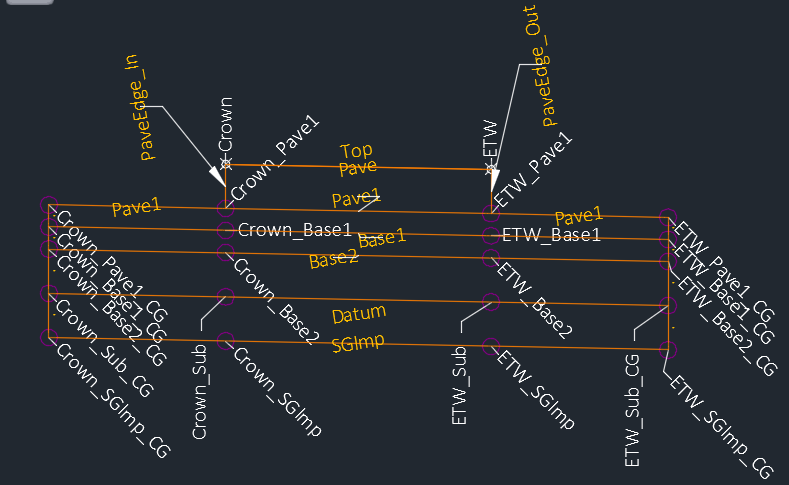
6. After editing all the 0.000’ values our subassembly now contains more codes than before.
7. Right-click on the new Code Set Style on the Settings tab of the Toolspace and select “Edit…”
8. Click the “Import codes…” button in the lower right of the dialog box.
9. Select the subassembly that now contains all the codes to add and hit <enter>.
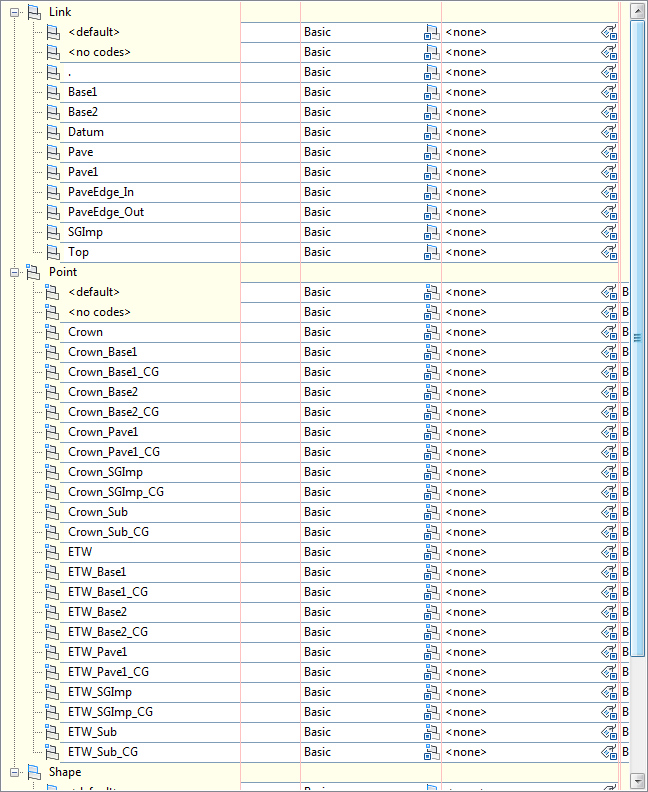
10. Check the Codes tab of the Code Set Style to see that all codes were now added.
In short, to add all subassembly codes to a Code Set Style insert the subassembly with values for all parameters and/or any subassembly options toggled on/off, etc.
Contact us to help you with adding Link, Point, and Shape codes to Code Set Styles.