A previous tip detailed that using any of the Flood Methods in MicroStation requires the entire region being flooded by visible in the view window.
A Commenter asked how to do this for a long, thin region where you couldn’t identify a point inside the area.
Here is how to accomplish that task…
In the image below we have a long roadway segment. There is a 25′ wide strip along the right side of the center line we want to fill.
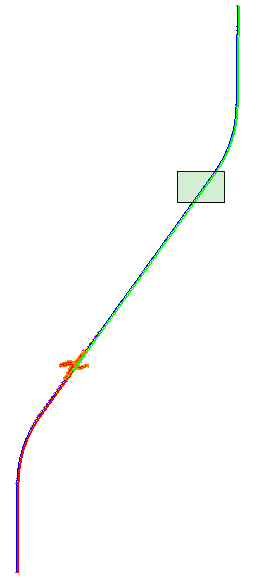
- Zoom in on the shaded area (or any area along the region) so that we can identify a blank area inside the region to be flooded.
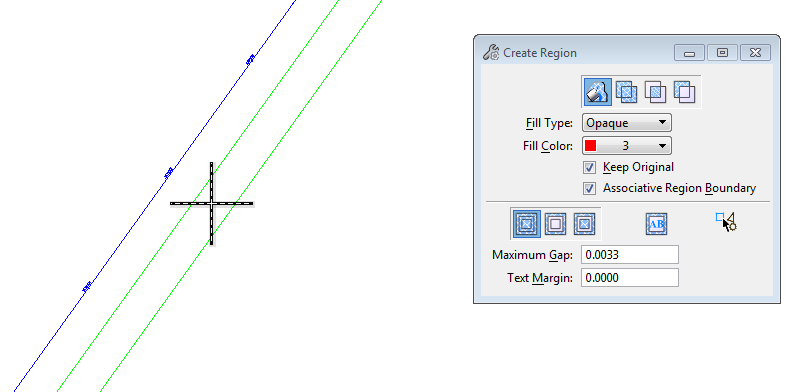
- Select the flooding tool (in this case Create Region) and configure the desired tool settings
- Place a tentative point somewhere inside the area to be flooded for the flood point – The tentative crosshair will have a dashed symbology
- Use your mouse scroll wheel to zoom out so the entire region is visible
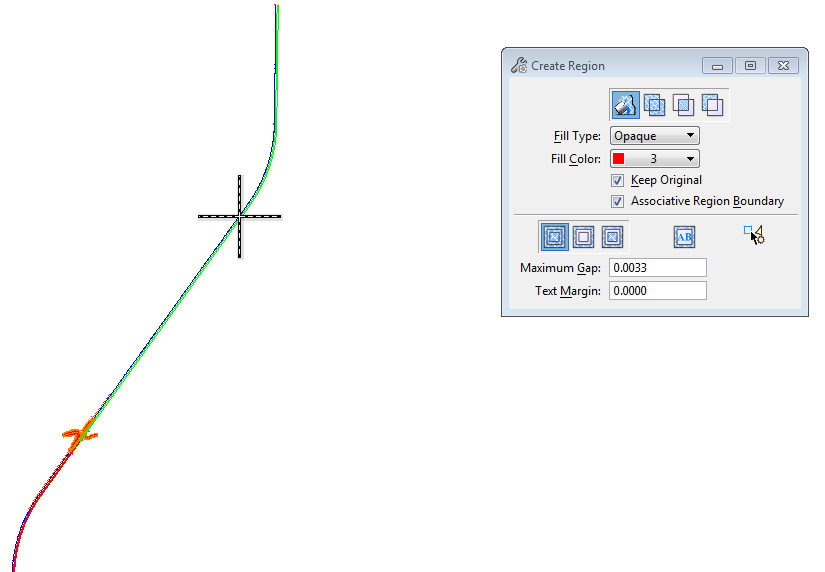
- Click a data point (<D>) to select the tentative point
- The bounding region will highlight
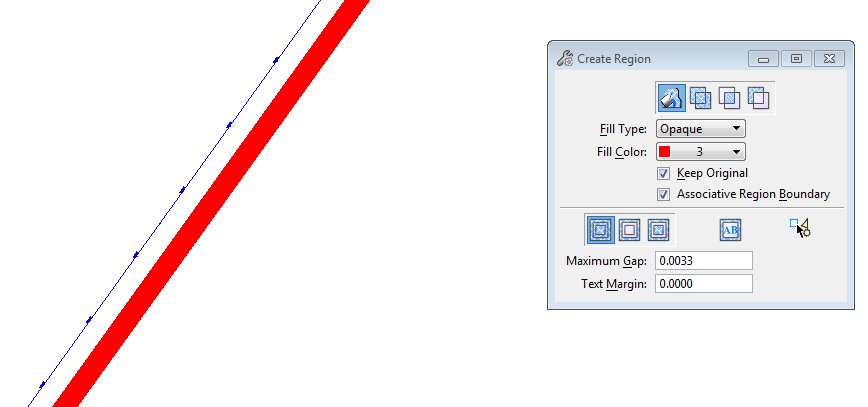
- <D> again to complete the flood
- The region is now filled.
Question –
In OpenRoads Designer, is there a way to shade tree cells with a 10% shade using a global selection ? (select by attributes, etc…)
If I need to shade 100 trees for a Public Hearing, I’d like to be able to shade them ALL at one time.
Thank you.
Judy,
Without actually seeing your data, and what you mean by a 10% shade, it’s a bit unclear what you are asking. I’ll take a stab and give you some options.
1. If the tree cells are filled shapes you can select all of the trees and change the fill color to a color that gives you the 10% shade you want.
2. Instead of changing the fill color of the tree cells you can change the transparency setting to 90% to give you the 10% shade. Just remember to turn on the Transparency View Attribute to display the transparency, and print with the Rasterized checkbox toggled on.
3. If the tree cells are not closed shapes, neither of the above two options will work for you. In that case you can create a pen table to select the cells, override the fill setting, and then assign the correct fill color and/or transparency so that the cells look correct when they print.
If you have more questions about this please contact me via email. Rod@EnvisionCAD.com