The Optimized Fence Clipping preference tends to confuse users as to what exactly it does.
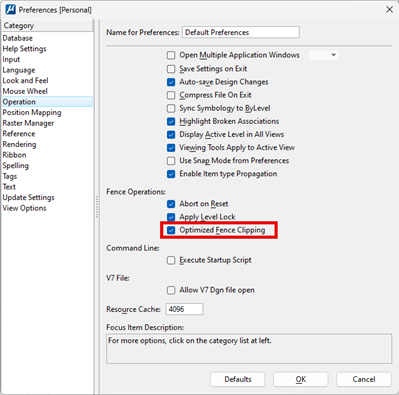
As the name implies, it works with fence operations using the clip mode.
Example: Optimized Fence Clipping Enabled
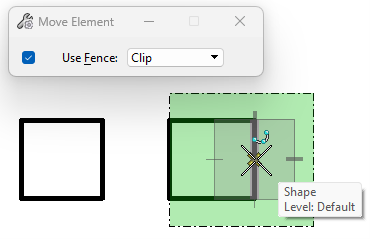
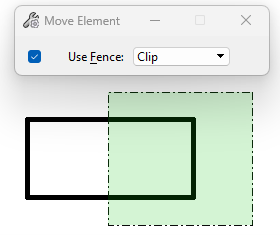
In this example, we are using the Move Element tool and a fence with the mode set to Clip.

After the move is executed, notice the single shape has been clipped into two new shapes. The Optimized Fence Clipping will reform the shape elements that have been clipped by a fence operation.
Example: Optimized Fence Clipping Disabled
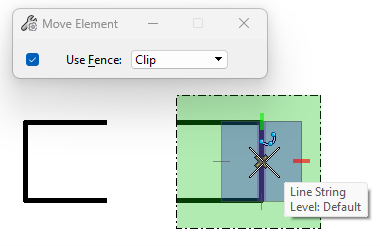
In this example, we are performing the same operation as the previous example, but this time the Optimized Fence Clipping option in our user preferences is disabled (unchecked).
After the move is executed, notice the difference in the result. Instead of creating two new shapes, the operation resulted in creation of two new line string elements.