This outlines the steps involved to translate an AutoCAD Civil 3D 2018 DWG file to MicroStation V8 DGN file format. The workflow is Civil 3D based and the final deliverable is a V8 DGN file.
Export to AutoCAD
1. In AutoCAD Civil 3D open DWG drawing file you want to convert to MicroStation DGN. In the command line type “EXPORTTOAUTOCAD”. The Export drawing name dialog will appear.
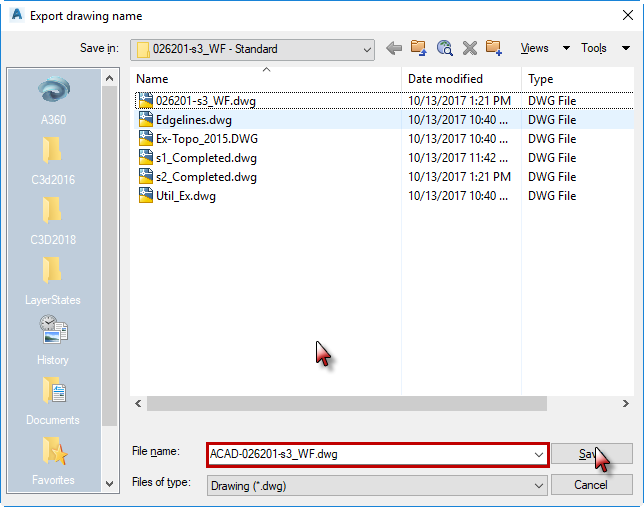
2. Click the Save button. The file will be exported to the folder. Note: Exporting a Civil 3D file to AutoCAD will create a new DWG file with all AEC objects exploded.
The default Export Options should work for most files. If any options need to be changed use the command entry: -exporttoautocad or aectoacad. The export process may take some time to complete depending on the complexity of the drawing and the number of Civil 3D objects.
If you get warning messages like this:
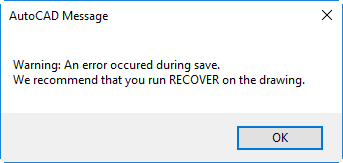
3. Click OK to keep the export process moving.
Export to MicroStation DGN
1. In AutoCAD Civil 3D open the previously exported ACAD-file. Use the AUDIT command to fix any errors. Some of the colors of the elements may have changed now that the Styles are not being used.
2. From the Application Menu Button select Export > Export Civil 3D Drawing.
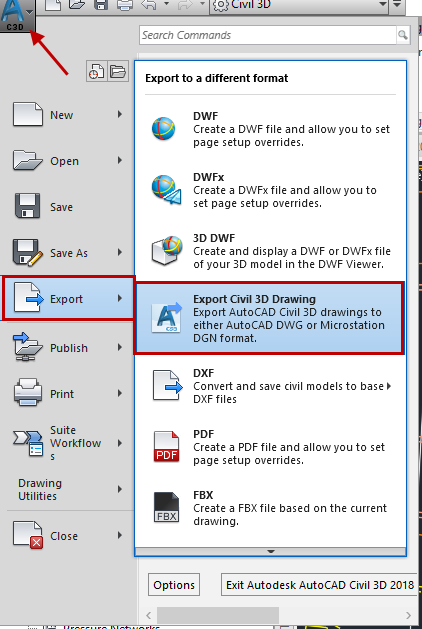
The export AutoCAD Civl 3D dialog will appear.
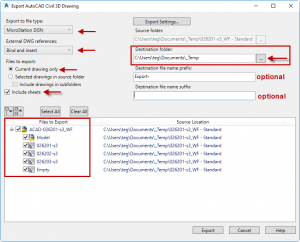
3. Under “Export to file type” select “MicroStation DGN”
4. Under “External DWG references” select “Bind and insert”
5. Under “Files to export” select “Current drawing only”
6. Checkmark “Include sheets” if you wish to export the layout sheets.
7. Audit
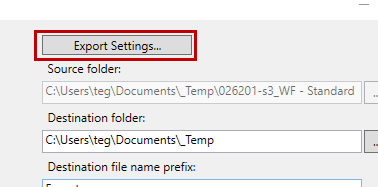
8. Under “Destination folder” click the button to browse to the location where the drawing will be saved.
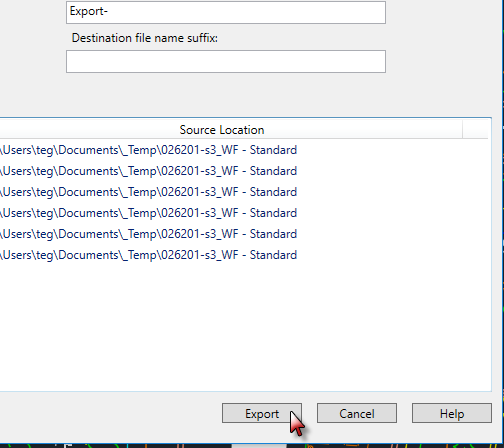
9. OPTIONAL: enter a prefix or suffix to add to the filename when exported.
10. Expand the drawing name underneath “Files to Export” and checkmark and/or uncheck the layouts as needed.
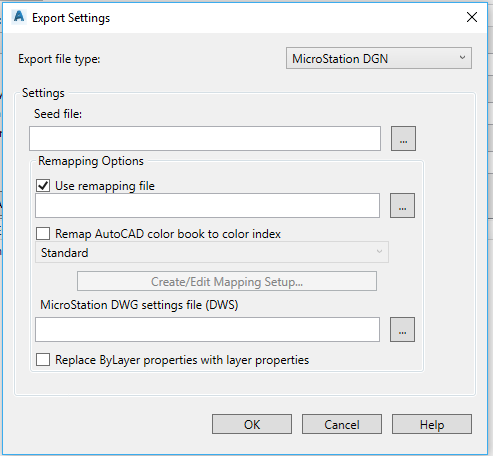
11. Next, select the “Export Settings…” button
12. “Export file type:” should be set to MicroStation DGN
13. Pick a seed file
14. Click OK to return to the previous dialog
15. Click Export
16. The Export Status dialog box will appear. Wait for the DGN(s) to be created.
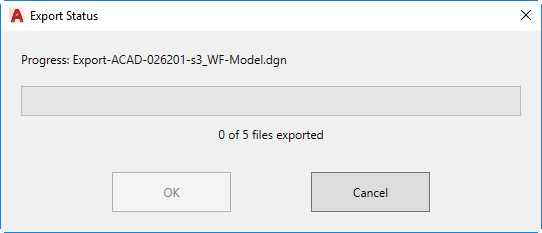
17. Click the OK button in the Export DGN settings dialog. The file will be exported to DGN.
Note: Be warned. The Export to MicroStation DGN process doesn’t always work. It is common for it to fail or crash Civil 3D without explanation.
Verify DGN results
1. Open the exported DGN file in MicroStation.
2. Locate a known coordinate location in the file and verify the coordinates out to 3 decimal points.
3. From the MicroStation pull-down menu Settings > Design File. The Design File Settings dialog will appear.
4. On the left side of the dialog select Working Units. Verify the units are US Survey Feet.
Will this work for state work? Will they know you did the work in civil 3d.?