There are many tools in MicroStation that contain a Flood method to create a shape, fill a shape, or to complete some other type of operation. In all of them, the Flood method may fail to find an enclosing region if the entire region is not visible in the view window.
Here is an example using the Hatch Area tool.
We are zoomed into one corner of the region we wish to hatch.
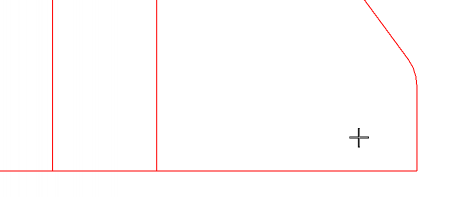
Selecting a data point in that area we get a message in the Message Center.
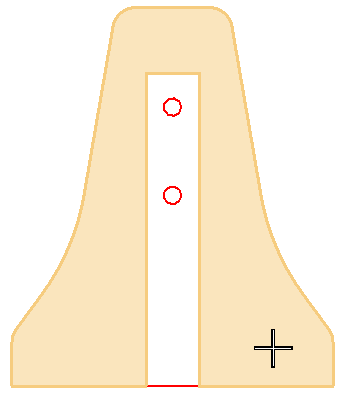
Zooming out and selecting a data point inside the region again the enclosing region is found.
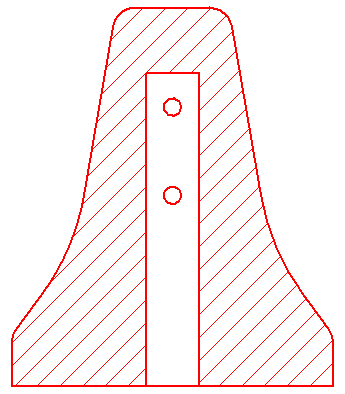
We are then able to complete the command and add the hatching.
So what if you’re working on a 5 mile stretch of road and the region you’re trying to select is too small to see/click on? How can I fill this area without making a bunch of smaller sections that will fit in my window?
To get around this do the following…..
1. Zoom in far enough so that you can identify a blank space inside the region
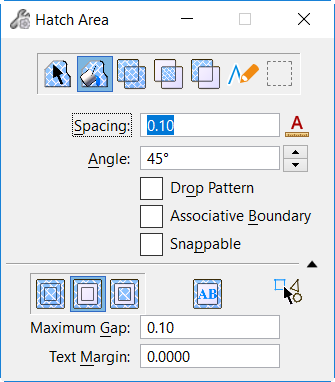
2. Select your flooding tool and configure the desired tool settings
3. Place a tentative point somewhere inside the area to be flooded for the flood point – The tentative crosshair will have a dashed symbology
4. Zoom out so the entire region is visible
5. Click a data point to select the tentative point
6. The bounding region will highlight and you can complete the flood operation normally