Wrtitten by Bob Mecham
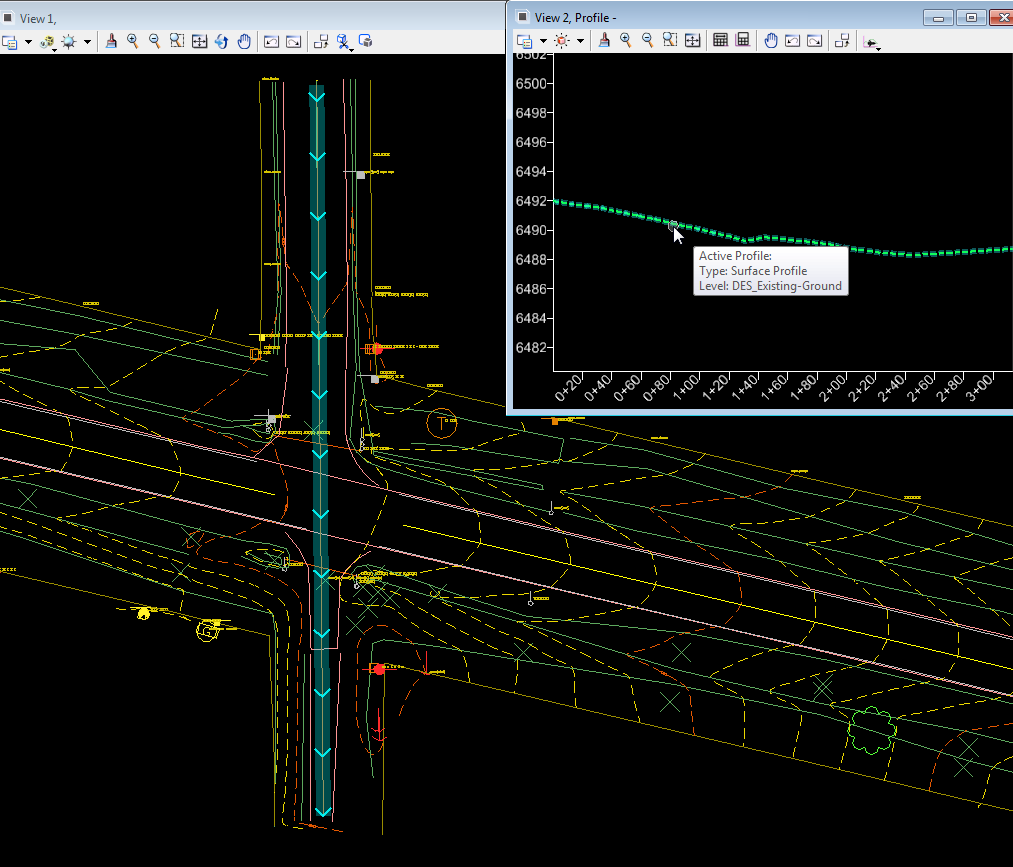
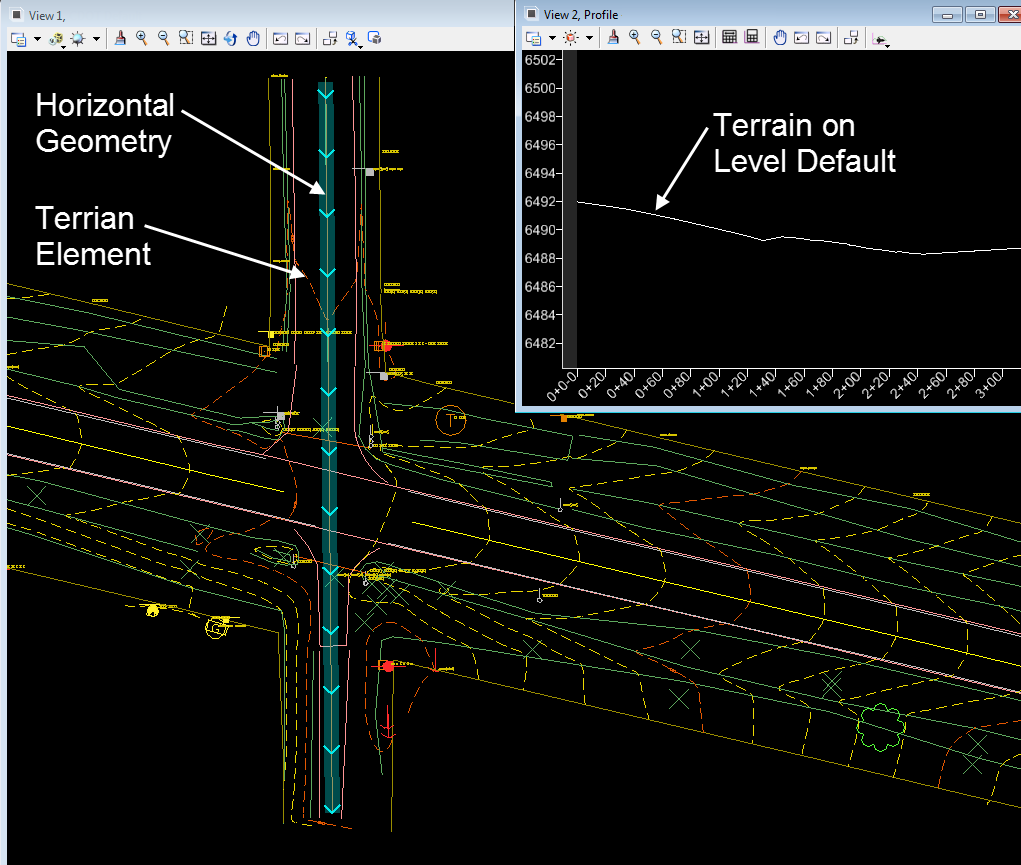
Does your Terrain Element end up on level Default when you view your Profile?
With a little setup of your Feature Definition and Element Template you can make sure the Terrain Element will end up with the level and symbology you are looking for.
1. Open the file with your Terrain Element.
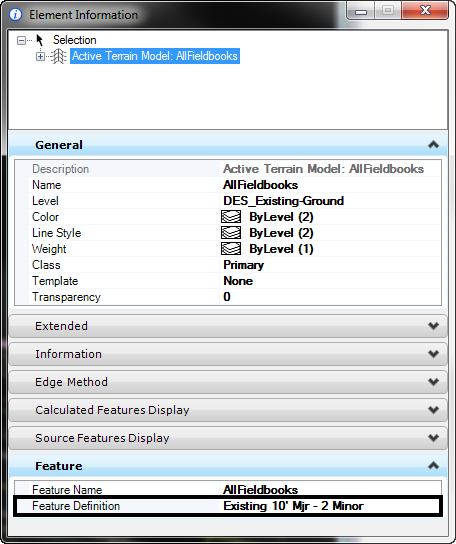
2. Select the Terrain Element and go to Element Information and see what the Feature Definition is set to. In our case it is Existing 10′ Mjr – 2 Minor.
3. Go to the Project Explorer dialog and under the Civil Standards tab locate that Feature Definition Existing 10′ Mjr – 2 Minor. Right Click and select Properties.
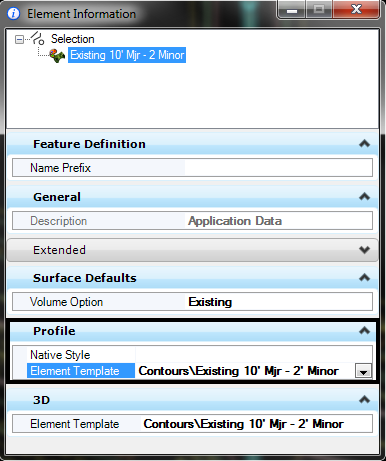
4. Set the Profile to a defined Element Template. In our case the Element Template name matches the Feature Definition name.
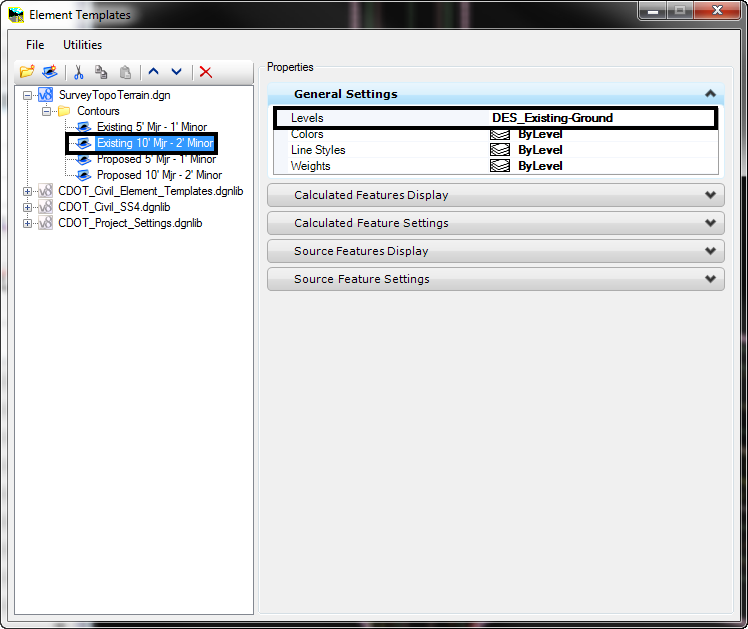
5. Go to the Element Templates dialog and define the Level under the General Settings section to what you want to see in the Profile.
6. Now when you cut a profile view the Terrain Element will be displayed on the correct level.