One of the most useful tools in Revit’s arsenal is the dimensioning tool. Revit makes it possible to lay out a rough floor plan without precision and then go back and dial in the dimensions and make quick changes.
On the Annotate ribbon, the first button is the Aligned and it is the one you will use the most. When you click the button you are offered some choices:


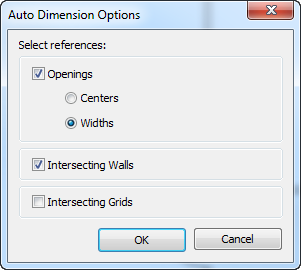
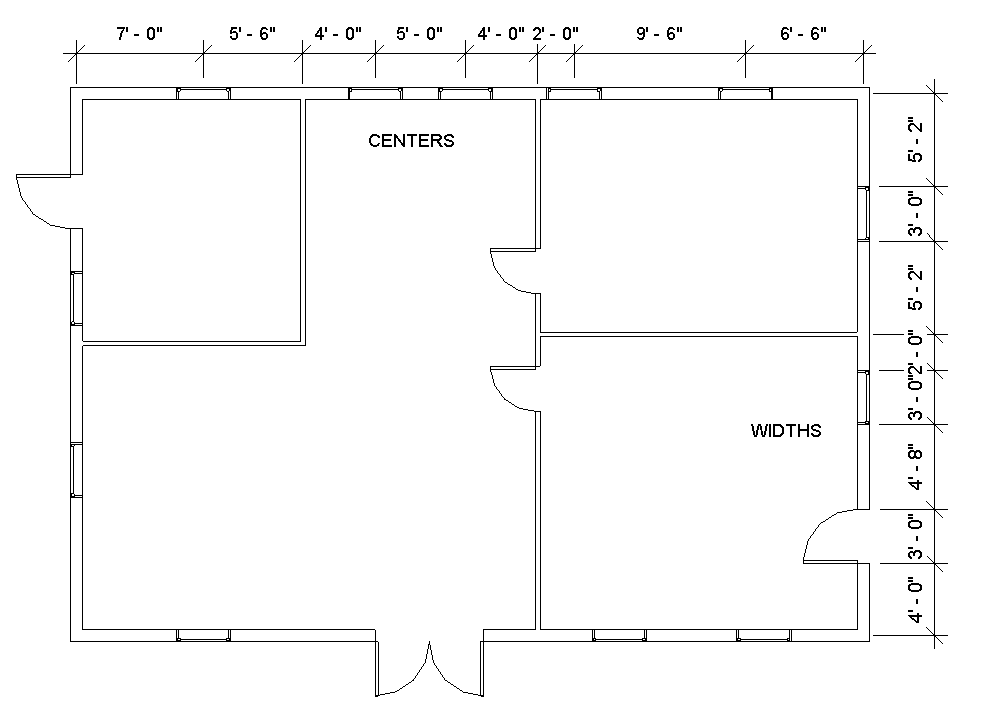
Depending on the project you can choose the centerline or core of the entire wall or the core. You can also pick Individual References or you can dimension the entire wall at once. Picking the Entire Wall gives you an Auto Dimensions Option Box with some more choices.
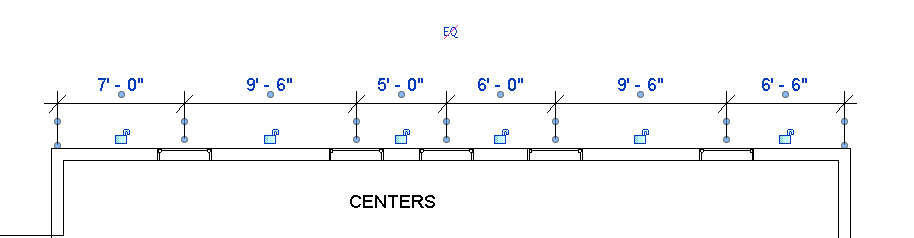
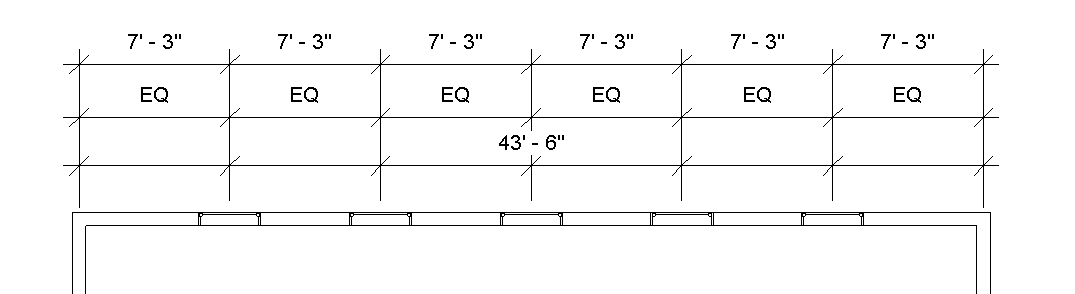
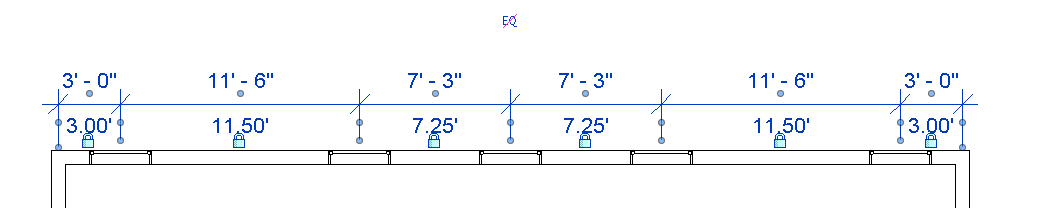
After clicking the wall the dimensions are blue. Each dimension has a lock and the overall string has EQ with a line through it. This is where the power is.
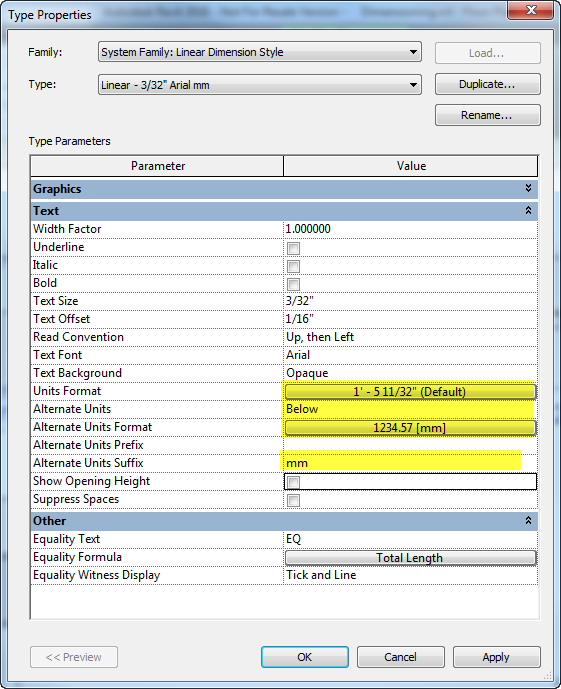
In the Properties box of the Dimension, there are three display options Value, Equality Text and Equality Formula.
A method of getting precise placement of windows is to use the Dimensioning tool. By selecting the window the dimensions on either side get smaller and turn blue. This is a temporary dimension and can be edited. Select the dimension you want to adjust and you get a box you can edit. Change the value and the window moves.

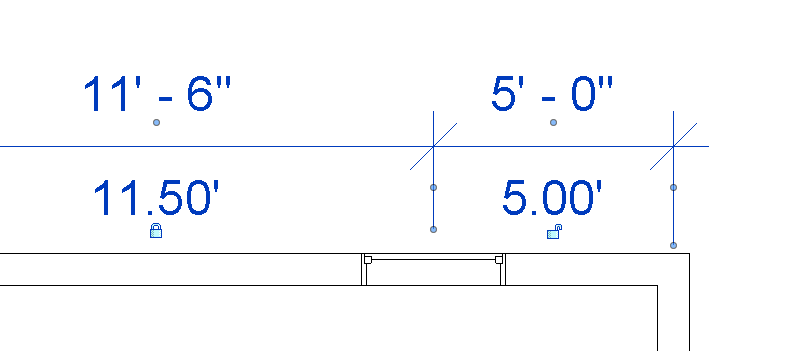
In the Properties Box, there are many different formatting options but one I find useful when different trades are using the same drawing is the alternate dimensions. You can use decimal feet for the Civil side or millimeters for international projects.

When you have all your windows in the proper place you can lock them in place to make it hard to inadvertently move them. Select the string of dimensions and a small lock appears below each. Click on each to either lock or unlock.
Now if a window is dragged or moved otherwise Revit will give you an error message that Constraints are not satisfied. It gives you the option to remove constraints or to cancel.
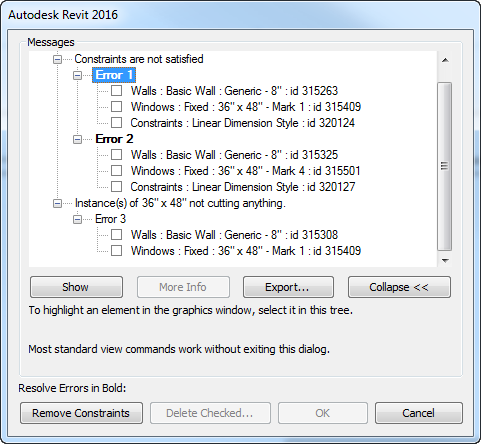
Removing constraints allows the object to move and unlocks the dimension.
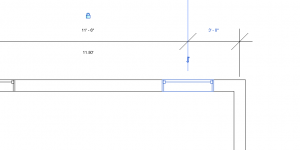
If an object has two dimensions attached they both have to be unlocked for it to be moved. For example, in this corner, the window can’t be moved but the wall can.
This is just the tip of the iceberg on Dimensioning in Revit. This only covered the Entire Wall option of the Aligned Dimension. There are many more powerful tools in the Dimension Ribbon that I’ll explore in future posts.