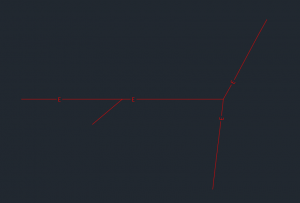
We’ve all run into this situation before. We have some utility lines drawn that use text in the linetype and the lines are either too short or are at a particular length that they do not display the linetype how we would like. Maybe in the past, you’ve changed the object linetype scale or joined lines together to use polyline linetype generation. Maybe you’ve inserted a block or put a break in a line and inserted text.

Some electric lines with linetype generation that is not ideal
How about using a Civil 3D Line Label Style?
Civil 3D Line Label Styles have a few features that make them a good solution for this type of situation.
• The text can be oriented to the object automatically.
• A background mask can be added to the text.
• The label has a diamond grip which makes it slideable along the line.
• The label will stay with the line if the line is moved or grip edited.
Part 1: Creating a Label
Let’s get started by creating a new Line Label Style.
1. Go to the Settings tab of the Toolspace. Expand General >> Label Styles >> Line

Line Label Styles
2. Right-click on Line and select New…

Create New Style
3. On the Information tab give your Label Style a Name and Description.

Information Tab
Depending on your Civil 3D default label settings you may have label text or objects already included in the new style. Skip to the Layout tab to delete anything unwanted.
4. On the Layout tab use the Component name drop-down to select an unwanted component. (Note: Table Tag is a default component of a Line Label Style and cannot be deleted.)

Layout Tab
Use the delete button to the right of the drop-down to remove unwanted components as necessary.

Component Delete
5. Continuing in the Layout tab add the text component that will be used to denote the linetype. To the right of the Component name drop-down is the Create component drop-down. Select Text and a text component will be created.

Create Text Component
6. Set the following values under General (including a descriptive name for your text component):

General Property Values
7. Under Text properties, click once in the Label Text area to reveal the Text Component Editor button. Then click the button to open the Editor.

Text Contents
8. On the Format tab, we just want to set the Justification to Center. (We will set our text style properties in a later step.)

Text Component Editor
9. In the text editor box on the right delete any text that is already there and enter the letter that is the text symbol for your linetype.
10. Set the following values under Text (including a text height that matches the text height of your linetype settings):

Text Property Values
11. Set the following values under Border (setting Background Mask to True will make it appear there is a break in the line for the symbol):

Border Property Values
12. On the Dragged State tab we will just turn this feature off. Set Visibility to “False”.

Dragged State Visibility = “False”
13. On the General tab, we can set our text style, layer, and label behavior settings. Set the Text Style to match the linetype text style settings. Set the Layer to match the layer of the utility lines in the drawing. Finally, set Orientation Reference to “Object”. (This setting places the text along the direction of the line instead of relative to the UCS.)

General Tab Property Values
Part 2: Using the Label
Let’s test it out…
1. Go to the Annotate ribbon tab >> Add Labels >> Line and Curve >> Add Line and Curve Labels

Add Line and Curve Labels
2. Select our newly created Line label style from the drop-down and click Add.

Add Labels
3. Select the lines you wish to add the linetype text to. Hint: select the exact point on the line where you wish the label to go.

Some electric lines with linetype generation that is not ideal

The inner drafter in me is pleased
4. If you select a label you will see it has a diamond grip to slide it along the line allowing further refinement.

Diamond Grip
5. And an added bonus…If you move or grip edit a line the label stays with it.

Auto-magically moved labels

This is a brilliant solution! I’m kinda mad I didn’t think of this before lol. But, part of me worries that this would become another thing for engineers to pick apart, rather than just accepting that linetypes are linetypes and there’s nothing you can do about the letters. I can imagine future redlines with every linetype circled and wanting to be adjusted “Move this E down just a little,” “Move this SD to the right,” ect lol
If I do end up making a lable style for linetypes… I’m definitely not letting any engineer know!