by Ben Johnson
Point data can come with a large number of unique attribute fields such as multiple elevations on a soil boring. A point can only have one elevation, but the other elevations can be shown using labels once those attribute fields are imported. In order to import these attributes, it is necessary to create User Defined Property Classifications for the points which can then be used to create a new point file import format. The following steps are the workflow for creating User-Defined Property Classifications.
1. Right-click on the Unclassified dropdown within the User-Defined Property Classifications which is under Points in the Settings tab of Toolspace, and click New.
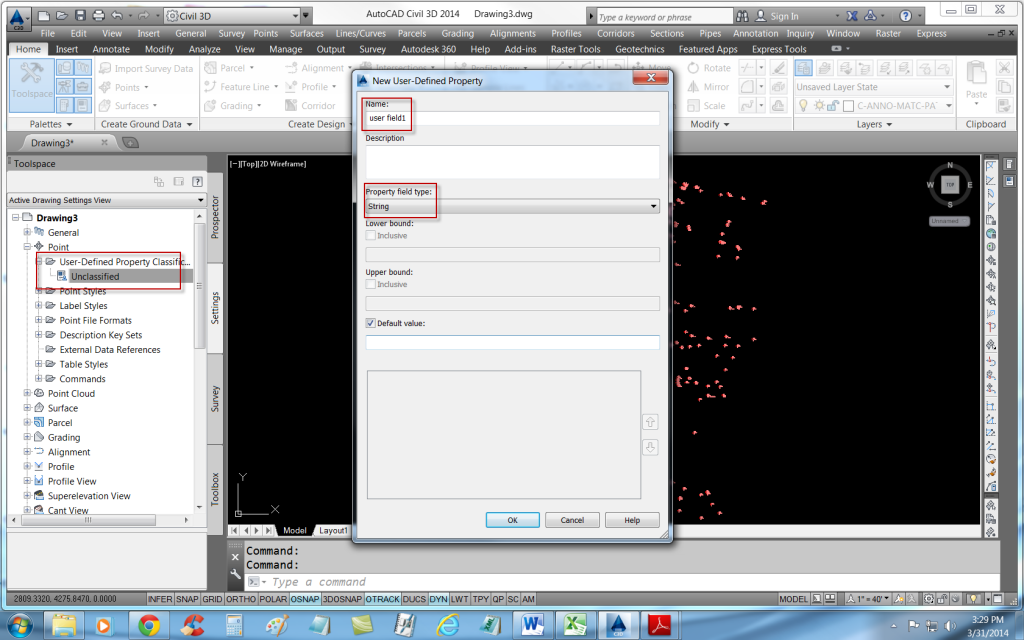
User-Defined Property dialog box
2. Give the new field a suitable name, and pick the appropriate field type from the drop down. Do this for every additional field to be added.
3. After all User-Defined Property Classifications have been added, a new point file format for importing can be created. Open the Import Points dialog box, and click on the Manage Formats button to create the new format.
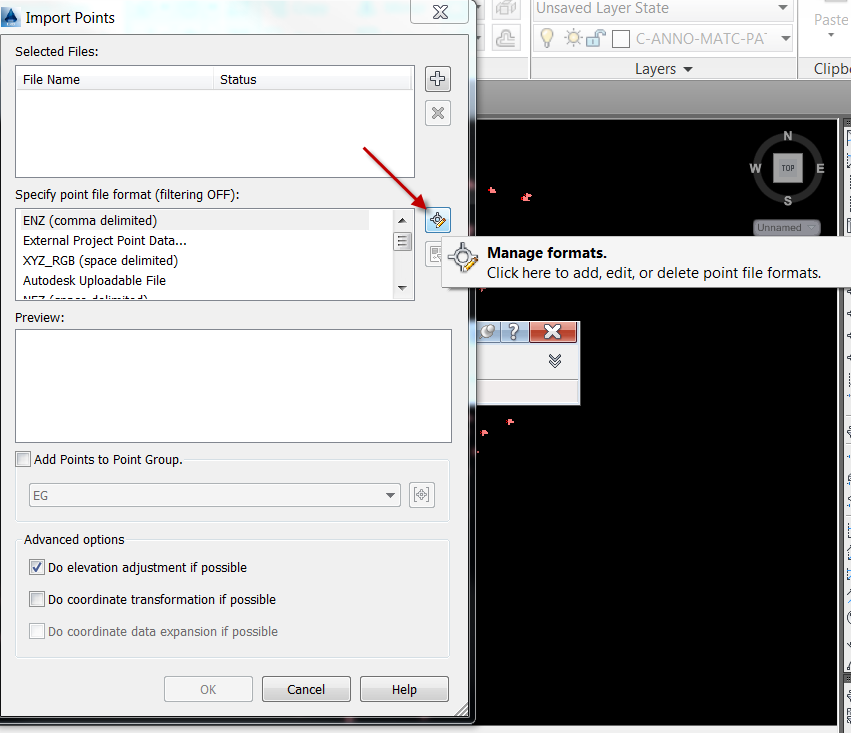
Create New Point File Format
4. Point File Formats dialog box will open. Click New to create a new one. Select User Point File for use with individual files.
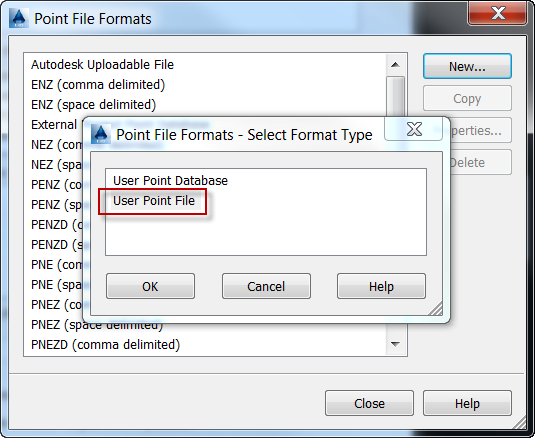
User Point File Format
5. Name the import file format something appropriate. Pick the default file extension. Delimiters can also be specified. Click on each of the (unused) fields and a dialog box will appear for you to set the field category.
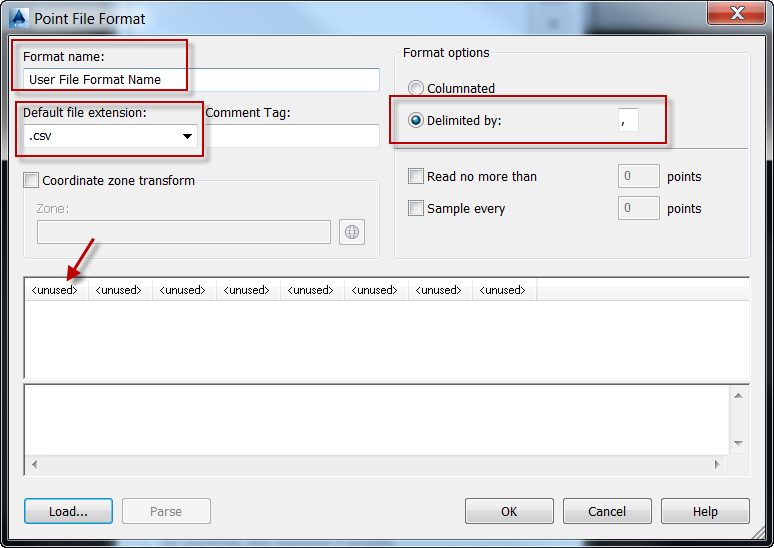
Setting File Format Name, File extension, Delimiter, and Fields
6. Many of the fields will be standard like northing and easting. Set those as needed, and then add the user-defined fields which you created and named in steps 1 & 2. They will show up in the Column name dropdown. Do this for all of your custom fields.
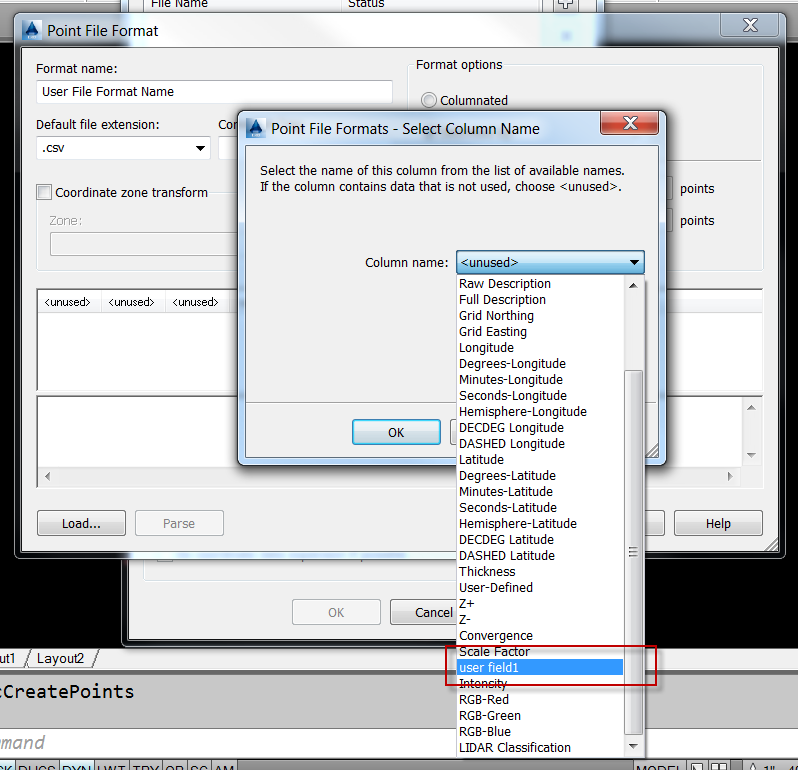
Select the Custom User-Defined Fields
7. Once you’re finished, click OK and you will see the new import file format show up in the dropdown list.
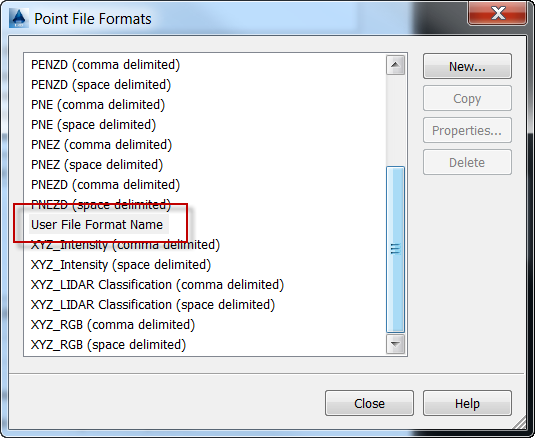
Dropdown List of Point File Formats
You can incorporate these User-Defined Property Classifications into your company template file so they will be there anytime you need them.
Last month’s tips:
 MicroStation: Automate InRoads: InRoads AutoCAD Civil 3D: VBA: Monitoring
Coordinate Entries Survey Options … Mark Point Subassembly.. Variable Changes
Don’t want to miss out on other great information? Subscribe to this blog or our monthly eNewsletter now!
Learn More ◊ Contact us today ◊ Newsletter ◊

How does this react when importing points via survey database?
User-Defined Property Classifications are added to Point objects, so they can be used with any import method.
One thing not mentioned above is the User-Defined Property Classification needs to be assigned to a Point Group and then when importing the points, import them into a point group that has that User-Defined Property Classification assigned. The default setting is “None” and the UDP Classification data will not be attached to the points when set to “None”.
To set the UDP Classification in a Point Group:
1. Right-click a Point Group in the Prospector and select “Properties…”
2. Select the “Summary” tab
3. Under the “General” section find the “Classification” Property
4. Select a UDP Classification from the dropdown list in the “Value” column on the right
5. Click “Apply” and “OK”
Note: A classification can be set to the “_All Points” Point Group to cover all imported points.