Civil 3D provides a mechanism for importing Civil 3D Styles from one drawing to another. On the Manage ribbon tab on the far right, there is an Import button in the Styles panel.

Manage ribbon
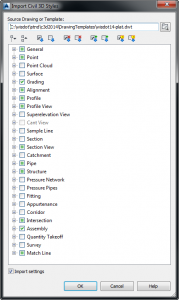
Clicking the Import button will prompt to select a Source drawing or template. Selecting a file will open the Import Civil 3D Styles dialog.


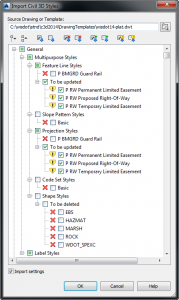
Import Civil 3D Styles
The dialog lists all the Civil 3D Styles in the source drawing. The preselected (check marked) Styles are styles able to be added to the target drawing, or styles that are conflicting and may need to be updated in the target drawing. The default selections may not be exactly what we want and editing the list is necessary. This review and selection process can be cumbersome, so much so that Autodesk provided a whole row of check/uncheck buttons at the top to aid in selecting styles. This is alright if I wish to import many styles, but what if I only want to import one style?
Styles can also be imported into a drawing by dragging them into the drawing window from the Settings tab of the Toolspace.
1. Open both the source and target drawings.
2. Make the target drawing active by selecting the drawing tab.
3. Switch to Master View in the Toolspace.

Settings Master View
4. Find the source drawing in the Settings tab and expand to see the available styles.
5. From the source drawing list, drag the desired style from the Toolspace into the drawing window.

Drag style from source to target
Where this comes in handy is you’ll notice in the Import Civil 3D Styles dialog there are particular drawing styles/elements that are not able to be imported through the dialog. Some of these are:
• Point Groups
• User-Defined Property Classifications
• Description Key Sets
• Pipe Network Parts Lists
• Pressure Network Parts Lists
These items can be imported into a drawing by dragging them in from the Toolspace instead.
