Using the Alignment Tool to Move to Another Alignment
When creating a Bridge Model, one of the first steps is to assign an Alignment to the Bridge. Sometimes the Bridge needs to be switched to a different Alignment. OpenBridge Modeler allows for the changing of a Bridge’s assigned Alignment.
- Open the file containing the Bridge Model.
- This file should already have the following attached as references:
- Alignment (horizontal and vertical geometry) with an active Profile (Alignment-1).
- Terrain – Active
- This file should already have the following attached as references:
- Reference in the desired Alignment for the Bridge (Alignment-2).
- It’s a good idea to have a different name for this second Alignment to make selecting it easier
- Ensure that Alignment-2 has an Active Profile.
- Set the Top View of the Model as Active.
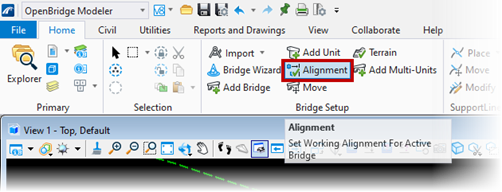
- Select the Alignment Tool located under the workflow OpenBridge Modeler > Home > Bridge Setup > Alignment.
- The heads-up prompt asks for the new Alignment (Alignment-2):
- In the Tool Settings Window, key in the Station to place the first Support Line of the Bridge at the new Alignment (Alignment-2). We have found that if the cursor moves off of the Tool Settings Window, the tool may not work correctly.
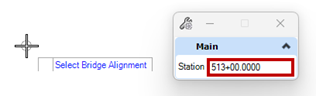
- Once the Station has been keyed in, press the <Enter> key to lock in that value.
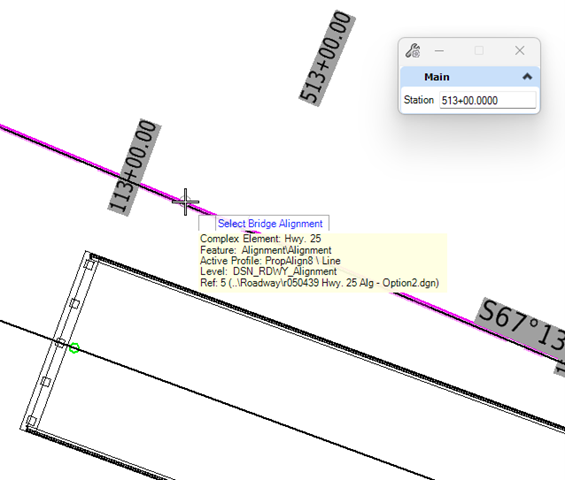
- Follow the heads-up prompt and Select Bridge Alignment:
- Select the desired horizontal alignment to associate with the Bridge (Alignment-2).
- Ensure that the correct Alignment is selected and that you are using the horizontal (vs vertical) geometry.
- The Bridge will move graphically in the plan and 3D Views.