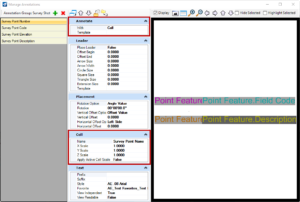
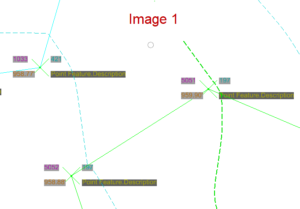
When annotating survey shots in OpenRoads CONNECT Edition using the Element Annotation tool it is sometimes desired to have text associated with the survey shot that doesn’t change scale when changing annotation scale in the survey dgn file. One way to make this work is to assign a Cell in the Annotation Group instead of using text. In Image 1 and Image 2 our annotation scale is set to 1”=30’. As you can see Image 1 is more legible because we checked annotation scaling off in the cell library. Image 2 has annotation scaling checked on in the cell library and what you get is text that is too large and covers up almost the entire survey linework and points. Within Image 1 I can change the annotation scale in the survey dgn file and the text will always remain the same scale. Follow the steps below in order to get static scaling for survey point annotation.
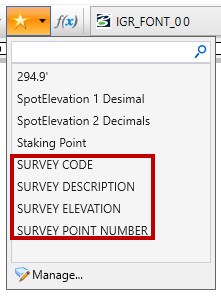
Step 1: Create a Text Favorite that includes fields associated to the Element Properties of the Point Feature. For Example I have created a text favorite below for the Point Name/Number, Field Code, Elevation and Description. These can all be separate as shown or grouped together as one text favorite.
Step 2: In your cell library referenced by your configuration create a new model and place the text favorite from Step 1 into the model. You can put all text favorites into one model or create multiple models as shown. It is important to make sure annotation scaling is shut off on the model as shown below.

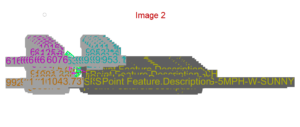
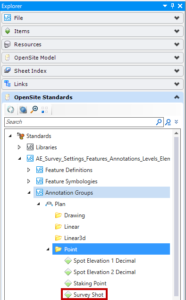
Step 3: Open the survey settings dgnlib file. In the Explorer dialog box navigate to Annotation Groups>Plan>Point. Expand the group for survey shots. If a group is not created for survey shots then one can be created. Prior to completing this step you will want to create the Annotation Definitions. I have created an Annotation Definition for Name, Code, Elevation and Description to add into the annotation group.
Step 4: In the Manage Annotations dialog box there is a tab called Annotate. In the Annotate tab change With to Cell and Template to None. Under the Placement tab you can create custom settings for the placement of the cell. In the Cell tab change the Name to the cell you have created in the cell library. Change Apply Active Cell Scale to False and now you will be able to annotate survey points with non-annotative text using the Element Annotation tool.